How to Turn Down Sensitivity on Blue Snowball
(Last Updated On: April 11, 2022)
If you find it hard to connect your mic to your computer, you might as well consider using a USB microphone. Of course, USB microphone technology had gone a long way since the first USB mic rolled out in the market. Now, USB mics like the Blue Snowball microphones are already competing well with other mics.
Moreover, USB mics are relatively easy to use because they are plug-and-play compared to other mics that necessitate an audio interface to make them usable with the computer. The Blue Snowball, for example, offers convenience for those who want to record narration or engage in audio or vocal projects using their computer.
Setting Up the Blue Snowball Microphone
Setting up the Blue Snowball microphone is not difficult. As mentioned above, it is a plug-and-play device that you can quickly hook to your computer using a USB cable. As such, even an inexperienced user of this mic can quickly set it up. Nevertheless, if you want the optimal settings for your Blue Snowball Mic, you might as well employ the following tips:
Initial Settings
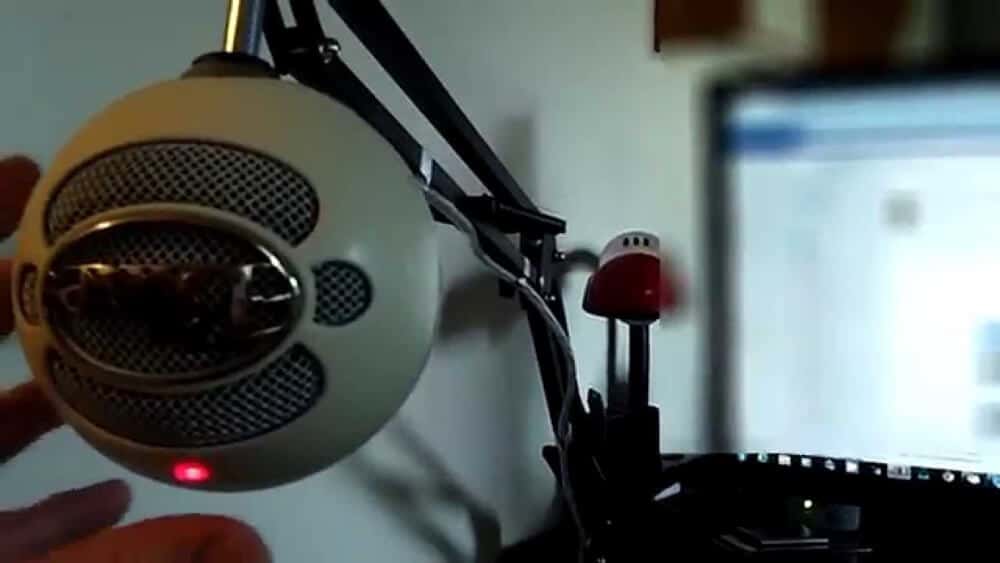
You'll need to ensure that the USB cable is plugged firmly into the Blue Snowball microphone at the onset. Then, plug the USB cord's other end to your computer's USB port. As you hook the mic to the computer, you will see a red light on the microphone's top.
This glowing red light will indicate that power goes to your microphone. It also indicates that the mic has connected to your computer. At the microphone's back, you will find three recording settings. You need to choose from one of these three settings before you can use your microphone.
Selecting a Setting
You can select the setting that you would like to use from these selections at the back of the microphone. You can simply slide the switch to your chosen number of a setting. Afterward, you can start recording using this microphone.
But what do these three settings indicate? Well, the three settings at the back indicate the numbers 1, 2, 3. These numbers refer to the following positions:
Position 1: comes with Cardioid Polar Pattern. This first position is suitable for recording narration and audio projects. Moreover, its best applications include speech, vocals, and podcasting. This polar pattern can pick up sound from its front and is perfect for podcasting, recording vocals/instruments, and game streaming.
Position 2: on the other hand, has a cardioid setting with a -10dB pad. It is perfect for music recording and is best for live music and loud sound sources. This setting lets you reduce the mic's sensitivity, allowing loud vocalists and instruments to come out crystal clear and free of distortion.
Position 3: however, carries an omnidirectional polar pattern. It is perfect for recording multiple sources of sounds in large room settings. It is ideal for conferences, environmental recordings, and interviews.
The Best Snowball Mic Settings for Different Applications
The Blue Snowball is great for singers as long as they know how to set it up for optimal performance and knows how to angle the mic. You can position the mic around four inches away from the mic's diaphragm if you have a big vocal sound.
Then, adjust the input volume properly on your PC settings. Moreover, you should use a sonically high-quality neutral pop filter like the Blue Pop to control the plosives and protect the diaphragm.
You can tilt the microphone upward a bit toward your forehead for a better head tone and more projection. You can also angle the mic toward your mouth for maximum intelligibility and brightness. Then tilt it down toward your chest for robust lows and smoother highs. It will be best to start with position one or position two for a start. In this way, you can activate the -10dB PAD.
Acoustic Guitar
The Snowball comes with a neutral tone which is best suited for capturing acoustic guitar's sound. You can position the diaphragm of this mic facing the guitar's neck where it joins the body. At the start, keep your mic close to the instrument while tilting the diaphragm toward the guitar's soundhole to capture the low frequencies and pick other sounds.
You can also move the mic nearer the soundhole if you need to capture more lows. On the other hand, you can move the mic away from the soundhole if you want to capture more high frequencies.
Electric Guitar
The Blue Snowball mic, with its solid bottom end and neutral response, is perfect for a distorted and clean guitar amp. If you want to capture more highs, you can angle the diaphragm toward the speaker's center, toward the speaker cone's edge to get a fuller sound with a more significant low end.
Moreover, you can move the mic towards the speaker cone's outer edge for distorted or overdriven tones. You can also back it a foot away from the amp to create a blend of the room tone and direct pickup sounds and soften the highs.
Drums
The Blue Snowball comes with an excellent transient response, and this feature comes with many benefits when miking the drums. You can begin positioning the mic up to four inches above the hoop or rim for hand drums. The mic should be toward the stick of the player or his hand for picking up more definition and attack.
Orient the diaphragm more toward the shell to soften the hand drum's sharp attack and pick up a more bright and crackling sound from the snare drum. You can likewise move the microphone closer to the drum for more low end and shell resonance. However, moving it away from the drums allow for more interaction of environment and drum sounds, for an airier capture of sound.
Streaming Application Settings
If you engage in recording Twitch streams, you will find the Blue Snowball a perfect choice for such an application. Besides, it is perfect for YouTube videos, though it may take you some time to achieve such applications' ideal settings. You can also use this mic for both streaming and recording. Of course, the perfect settings for such applications are achievable, and here are some tips that you can follow to achieve such a high level of results:
Boost Your Microphone: This mic's effectiveness in giving you the best capture of your voice depends on how far you position the mic from your lips. So, it will help if you move the mic closer to your mouth. In case you need to position the mic farther away from your mouth, you need to boost the mic.
Turn the boost slowly to figure out the sweet spot for your application. You can also adjust the mic's volume on your main window as you try to boost it slowly. Eventually, you will find the sweet spot wherein your voice will sound crisp and clear.
Suppress the Background Noise: It will also be useful to add a Noise Suppression Filter aside from the Noise Gate Filter. The Noise Suppression Filter works well with the Noise Gate, preventing background noise like those coming from passing cars and fans.
The Noise Suppression Filter's default setting is at 30, but you can still try to keep it at 25 to figure out what works for you. You can also use other recording programs, depending on your preference.
How To Upgrade Your Snowball Microphone Setups
You can also upgrade your mic by using the Snowball compatible boom stands and adding some noise reduction filters. In this way, you can optimize your mic for picking up only your voice. Upgrading will be best, especially if you are live streaming through YouTube or Twitch.
You can do this by going to the main microphone menu to find the Filters box option . Next to Filters is the cog button . Click on that to open up another menu. Click on the plus sign to add the filters you are desirous of. You can also add a Noise Gate filter to improve audio quality.
The Noise Gate will tell your mic to shut off when you don't talk, and it will only pick up sounds once you talk. In this way, you can prevent the mic from picking up ambient sounds. It can also stop the mic from capturing and recording sounds below the specified decibel level.
It will indeed prevent the capture of background noises like those coming from fans, keyboard clicks, and other background noise.
Add a Shock Mount to Your Mic
The Snowball comes with a unique swivel mount that you can see at the mic body's bottom center. You can ensure that the mic is mounted on the desktop tripod to ensure it is sturdily supported. If you want to reduce the low-frequency rumble, you can mount it on the Blue Ringer.
Of course, the Blue Snowball Mic is durable, but it is better to ensure that it will not fall because of inadequate support. With proper positioning of the tripod, you can prevent it from tipping over. If it is properly mounted, you can easily pivot the mic back and forth for better positioning and angling.
Conclusion
The good thing about USB microphones like the Blue Snowball Microphone is that they attempt to facilitate the process of connecting mics to computers. The USB mics have gone a long way since the very first USB mic was rolled out. At present, they are becoming more and more reliable, and I think, soon, they will be very much on par with the other types of microphones.
The original Snowball mic was first introduced 15 years ago, and the present Blue Snowball microphone is already a far cry from the original one. At present, the Snowball mic has many supporters. It may have its downsides, but with proper tweaking of settings, you can achieve a high efficiency and effectiveness level for this mic.

James Mann is a 36-year-old session singer and vocal coach who loves to share his singing and musical experiences online. Besides focusing on singing. Songwriting, music production, studio setups and vocal recording and mastering other musical instruments are his passion too.
Source: https://www.becomesingers.com/studio-setups/blue-snowball-mic-settings
0 Response to "How to Turn Down Sensitivity on Blue Snowball"
Post a Comment